Insights

Integrating Microsoft Dynamics CRM with SharePoint Online

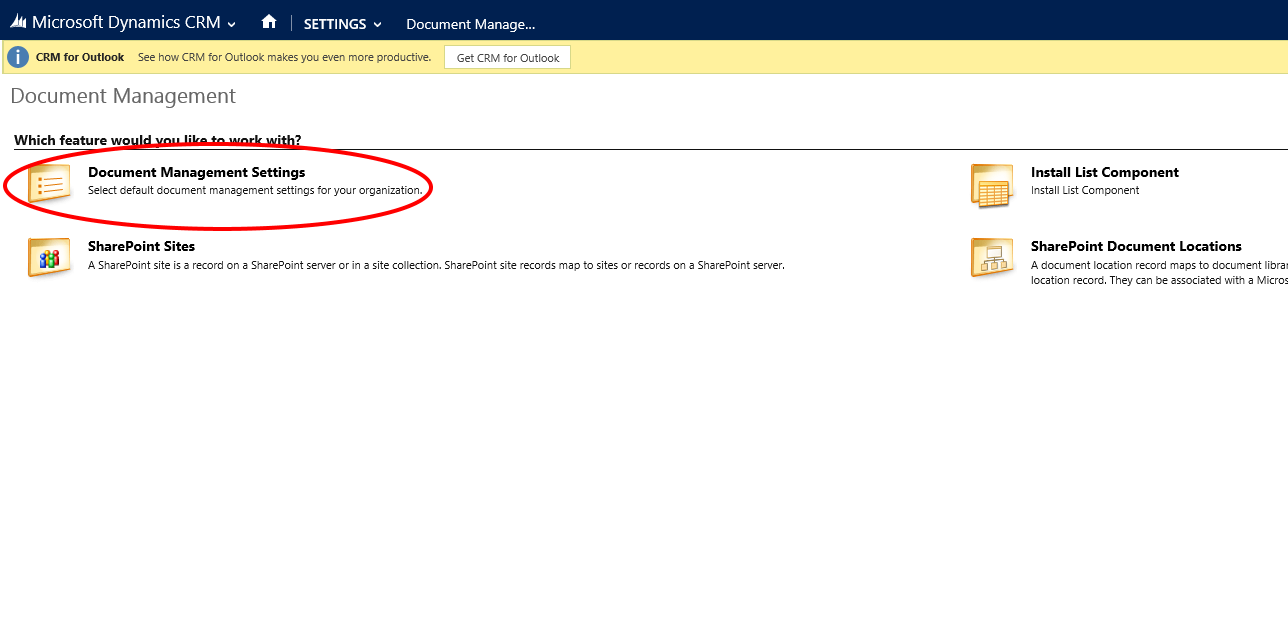
The purpose of this article to provide a complete step by step process on how to integrate Microsoft Dynamics CRM with Microsoft SharePoint using the out-of-the-box configuration tools provided by Microsoft for both platforms.

The steps will guide you through setting up a collection in SharePoint and configuring both CRM on premises and online to connect with SharePoint.

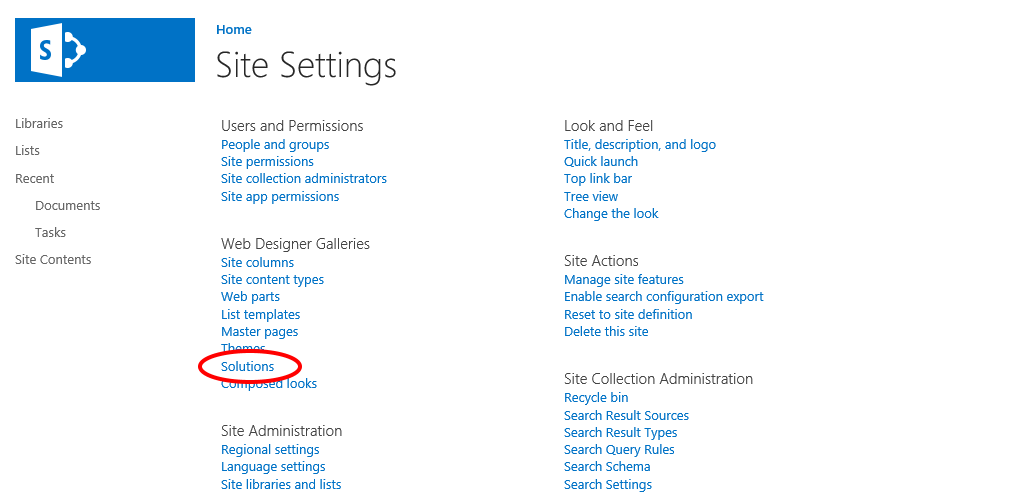
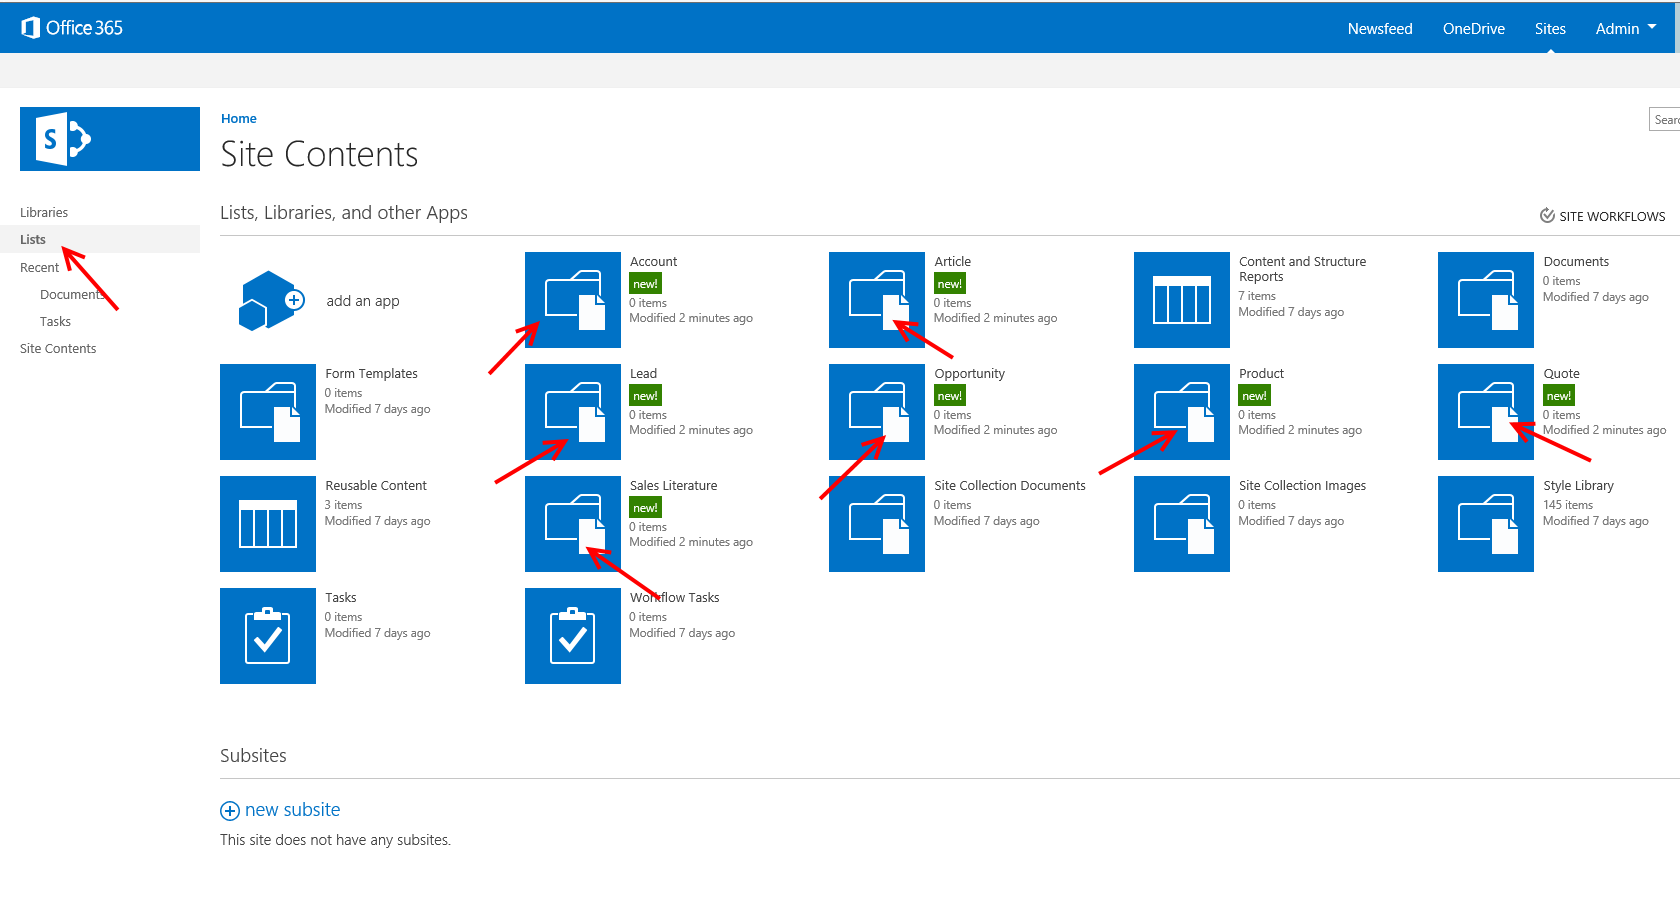
Firstly, you’ll want to create a new collection in SharePoint to keep your files separate.

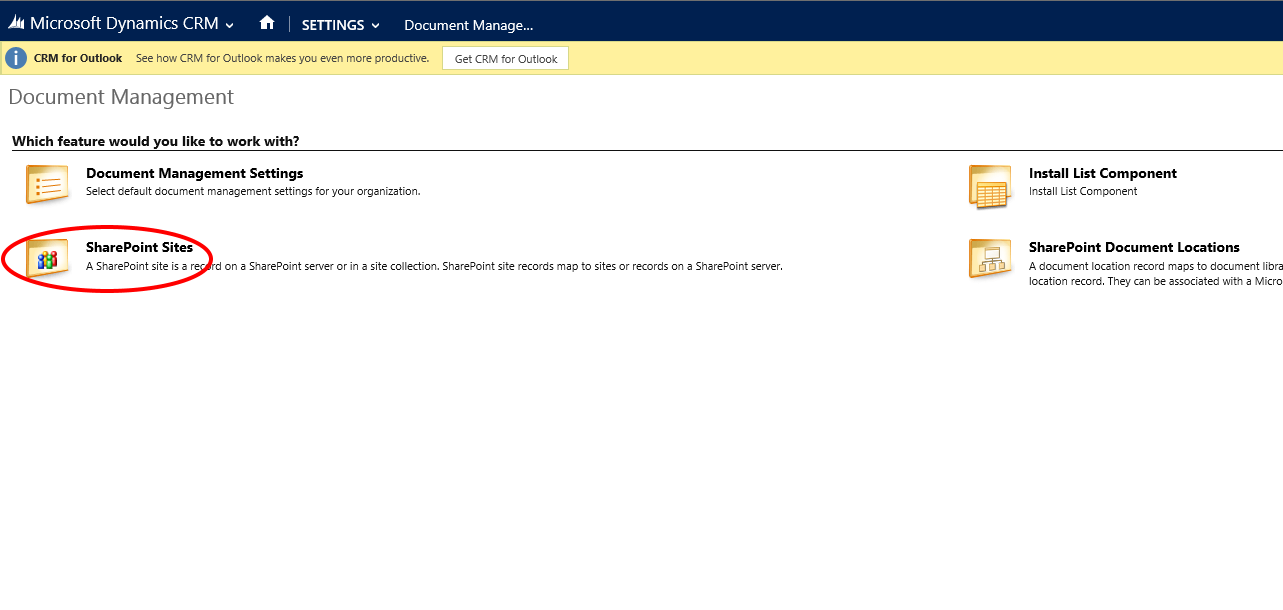
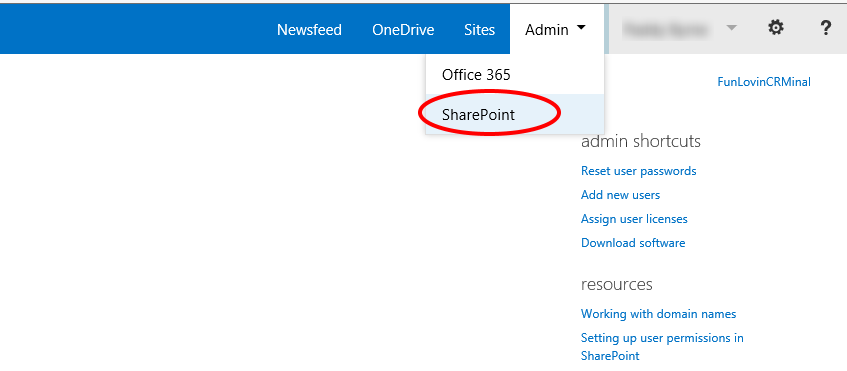
You start by logging into my Microsoft Online Services portal as an administrator. Then, by clicking on the Admin menu item at the top and selecting SharePoint in the drop down menu, you are taken to your SharePoint Admin Center.

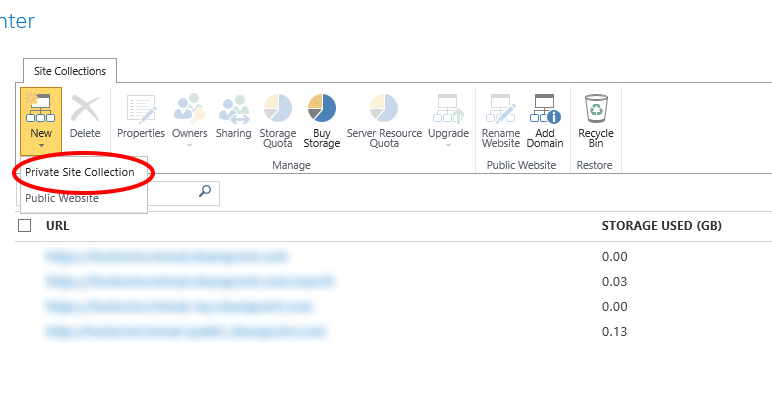
Clicking on the ‘New’ ribbon button will allow you to either create a new private site collection or create a new public website. You want to create a new private site collection so choose this option.

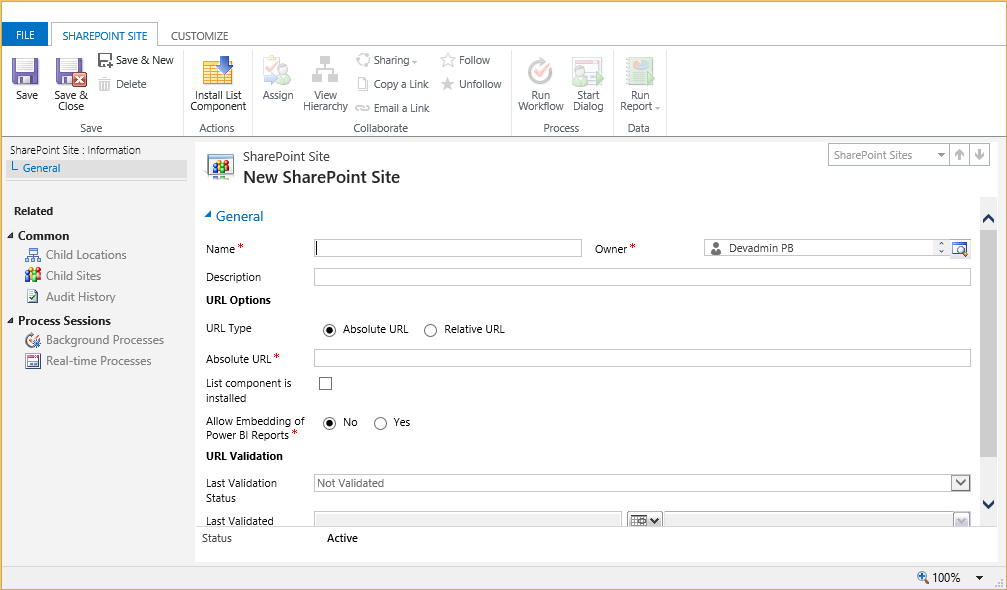
This will present you with a form in which you can specify basic properties of your new collection.

I’ve given the new site collection a title and web site address and I’m going to use the Document Centre template but you should choose a template which suits the purpose of your collection. I’ve chosen my local time zone and myself as the administrator. For storage quota I’ve chosen to enter 1024 MB and make 300 resources available in the Server Resource Quota field. Again, I’m using this collection for test / demo purposes only, you should choose values appropriate to what you’re using the collection for.

After completing the form and clicking OK, SharePoint will start creating the Collection. This can take approximately 15 minutes.

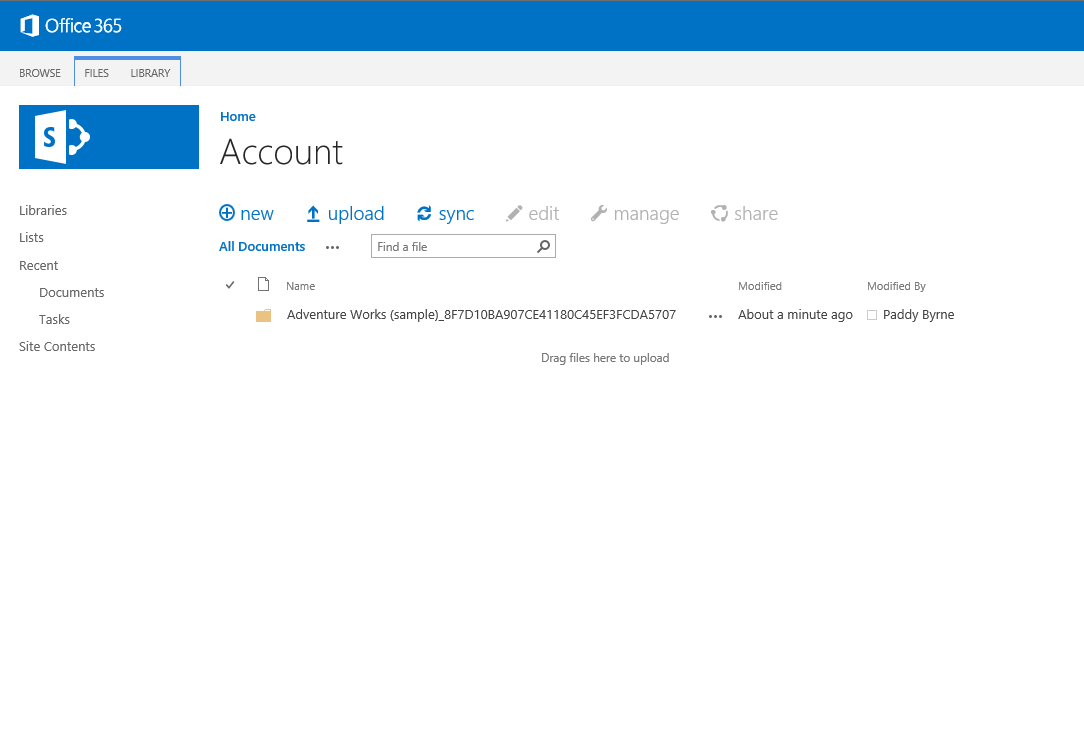
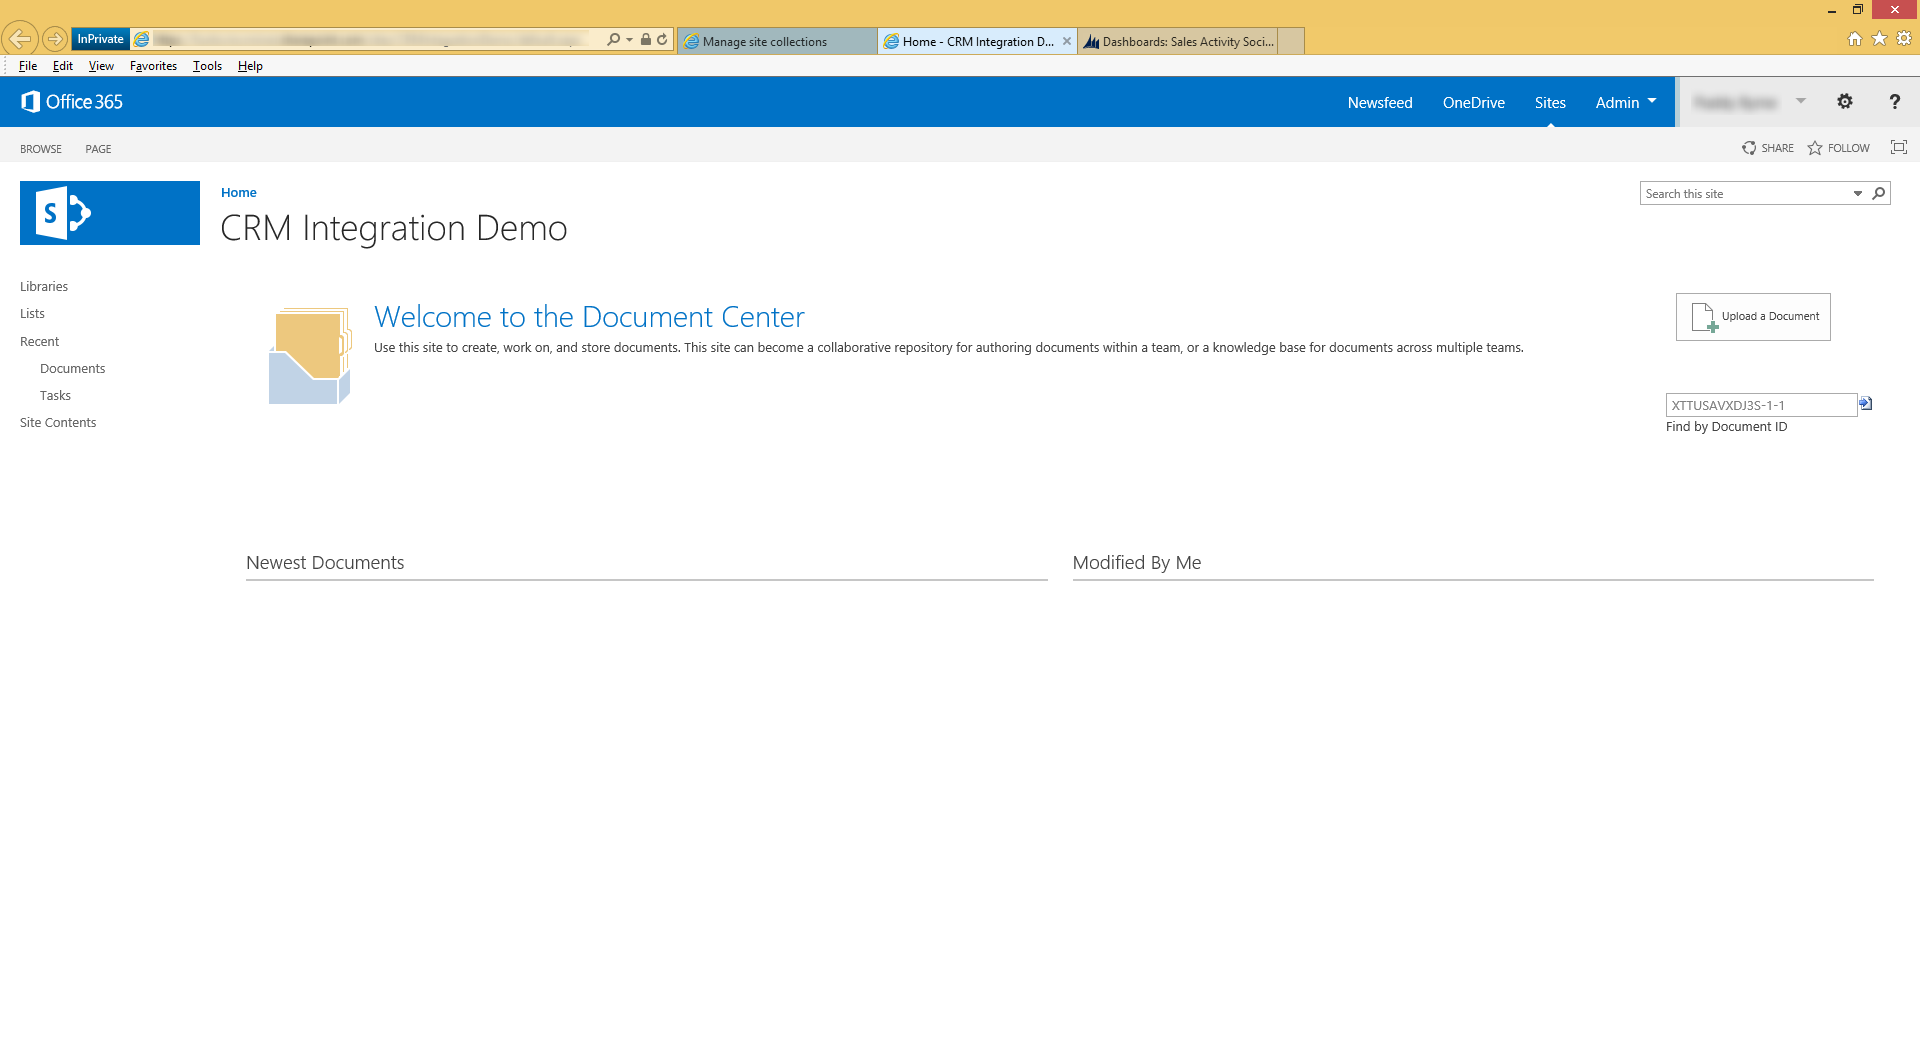
Once your collection is created you can click navigate to the URL you specified earlier to enter it.

The steps taken to integrate CRM Online and CRM on-premise used to be the same but this changed in the Spring 2014 update when Microsoft introduced server-side synchronization which allowed seamless synchronisation between the two platforms as long as they both resided in the same Microsoft Online Services environment.

On-Premise

The first thing to do is to download the CRM 2015 list component by clicking here.

There are two versions available, one for SharePoint 2010 and one for 2013. As we’re using SharePoint 2013, that’s the one we’ll download.

Run the CRM2013-SharePointList2013-ENU-amd64.exe file that you downloaded and accept the software license terms.

Clicking Continue will prompt you to extract the files to a directory. Choose a directory and click OK.

The following 3 files are extracted:

  • crmlistcomponent.wsp
  • AllowHtcExtn.ps1
  • mscrmsharepointeula.txt

Navigate to your collection and click the settings icon in the top-right corner to expose the settings menu.

Select ‘Site Settings’.

Under ‘Web Designer Galleries’ click ‘Solutions’.

In the application ribbon click ‘Upload Solution’.

Click the Choose File button and browse, locate crmlistcomponent.wsp and click OK.

Once the solution has been uploaded click Activate to Activate the solution then click the Close button to close the window.

N.B. After clicking Activate there is no prompt to inform you that the solution has been activated.

You should now see the CRM List Component listed as activated.

Now within your Dynamics CRM environment navigate to ‘Settings > Document Management’ and click on ‘SharePoint Sites’.

Click ‘New’ above the view of Active SharePoint Sites and you should be presented with the New SharePoint Site form.

Fill out the Name and Description fields as you please and add the URL of the SharePoint site you created earlier.

Check ‘List Component is installed’ and Save and Close the record.

From SharePoint Sites view, highlight your newly created SharePoint site and click ‘Validate’.

Please Note: In order to validate your SharePoint site, you must be logged into your SharePoint site in the same browser session.

Next, we want to specify which entities will be document enabled.

Click ‘Document Management’ in the navigation pane to return to the main Document Management page and select ‘Document Management Settings’.

You will be presented with a grid showing all entities which have the ‘Document Management’ property enabled where you can select or unselect each entity.

By adding your SharePoint site URL in the field provided and Clicking ‘Next’ you will be able to select how your documents should be structured in SharePoint.

It’s entirely your preference how you want to structure your document library or if you even want to use the structures at all. You have three choices here:

  1. Create the structure based on the Account entity (the path of a case named ‘mycase’ for ‘myaccount’ will be https://sharepointurl/myaccount/case/mycase).
  2. Create the structure based on the Contact entity (the path of a case named ‘mycase’ for ‘mycontact’ will be https://sharepointurl/mycontact/case/mycase).
  3. Don’t create a directory structure and use your own.

Since I like to link my Opportunities and Cases to Accounts, I’ll choose to create my directory structure based on Accounts. So I’ll choose this and click ‘Next’.

Once CRM has completed creating the documents click Finish.

Within your SharePoint site you can now see the new directories under the Lists section.

Now that the integration is complete we will be prompted to create a document folder when we browse to the “Documents” section of any record of any of the entity types specified.

The folder is created in SharePoint for you:

And you can use either Dynamics CRM or SharePoint to add documents to the folder.

CRM Online

As mentioned earlier, when Microsoft released the Spring 2014 update to Dynamics CRM online they introduced server-based SharePoint Integration.

This makes the integration configuration a lot easier as there is no need to install the list component and as both SharePoint and CRM reside on the same Microsoft Online Services environment there is no need to log into both platforms separately.

In order to configure the integration start by browsing to ‘Settings > Document Management’. You’ll notice that there is now notification at the top of the screen prompting you to enable Server-Based SharePoint Integration.

Clicking ‘Enable Now’ or clicking ‘Enable server-based SharePoint integration’ from the main window will prompt you for your SharePoint URL which you can enter, click Next and the validation process will start automatically.

Once your URL is validated, click ‘Finish’ and you can start setting up your document library structure just like I explained in the on-premises setup instructions.